How To Install A Ceiling Fan Like A Pro
A ceiling fan is more than just a fixture; it’s a year-round MVP for home comfort. In the summer, it creates a cooling breeze, and in the winter, it can be reversed to circulate warm air, helping you save on energy bills. While installing one might seem like a job reserved for a professional, it's a surprisingly manageable project for a confident DIYer.
Think of us as your expert on the other end of the line, ready to walk you through it. We'll cover everything from the crucial safety checks to the final blade assembly. Whether you're replacing an old light fixture or installing a fan in a brand-new spot, this guide will give you the confidence to get the job done right.
On average, a homeowner can install a ceiling fan in about two to three hours. If you were to hire a professional, the cost to install or replace a ceiling fan typically ranges from $150 to $400, depending on the complexity of the job. By doing it yourself, you not only save money but also gain valuable home improvement skills.
Ready to get started? Let’s get that fan up and spinning.
Safety First: Preparing for Your Ceiling Fan Installation
Before you even open the fan box, we need to talk about safety. You're working with electricity, so there's no room for shortcuts.
-
Turn Off the Power: Go to your home's electrical panel (or breaker box) and find the circuit breaker that controls the power to the room you're working in. Flip it to the “OFF” position. If your breakers aren't labeled, you may need to turn on the existing light and flip breakers one by one until it goes out.
-
Confirm the Power is Off: This is a non-negotiable step. Use a non-contact voltage tester to double-check that there is no electrical current in the wires you'll be working with. Simply place the tip of the tester near the wires inside the ceiling box. If it doesn't light up or beep, you're safe to proceed.
-
Gather Your Tools: Having everything on hand makes the process much smoother. You’ll generally need:
- A stable stepladder
- Phillips and flat-head screwdrivers
- Wire connectors (often included with the fan)
- A non-contact voltage tester
- Safety glasses
- The new ceiling fan kit
-
Read the Manual: Every fan is slightly different. The instructions included with your specific model are your best friend. Read them thoroughly before you begin.
The Foundation of Your Fan: Is Your Electrical Box Fan-Rated?
This is the single most important check you'll perform. A ceiling fan is heavy and generates constant vibration while running. A standard plastic electrical box, designed to hold a lightweight light fixture, is not strong enough to support a ceiling fan.
Here's how to inspect your existing electrical box:
- Remove the Old Fixture: If there’s a light fixture or an old fan, carefully remove its canopy to expose the electrical box it's attached to.
- Look for a "Fan Support" Stamp: A fan-rated box will be made of metal and is often stamped with a phrase like “Acceptable for Fan Support” or will list a maximum fan weight.
- Give it a Tug: Gently try to wiggle the box. It should feel completely solid. A fan-rated box must be screwed directly into a ceiling joist (the wooden beams that frame your ceiling) or a metal fan brace. If it moves or feels loose, it's not safe.
What did you find?
- If your box is metal, stamped for fan support, and rock-solid: Excellent! You’re ready to move on to the installation.
- If your box is plastic, not stamped, or feels loose: Stop right there. You must replace it with a fan-rated box before proceeding. Don't worry, we'll cover how to do that.
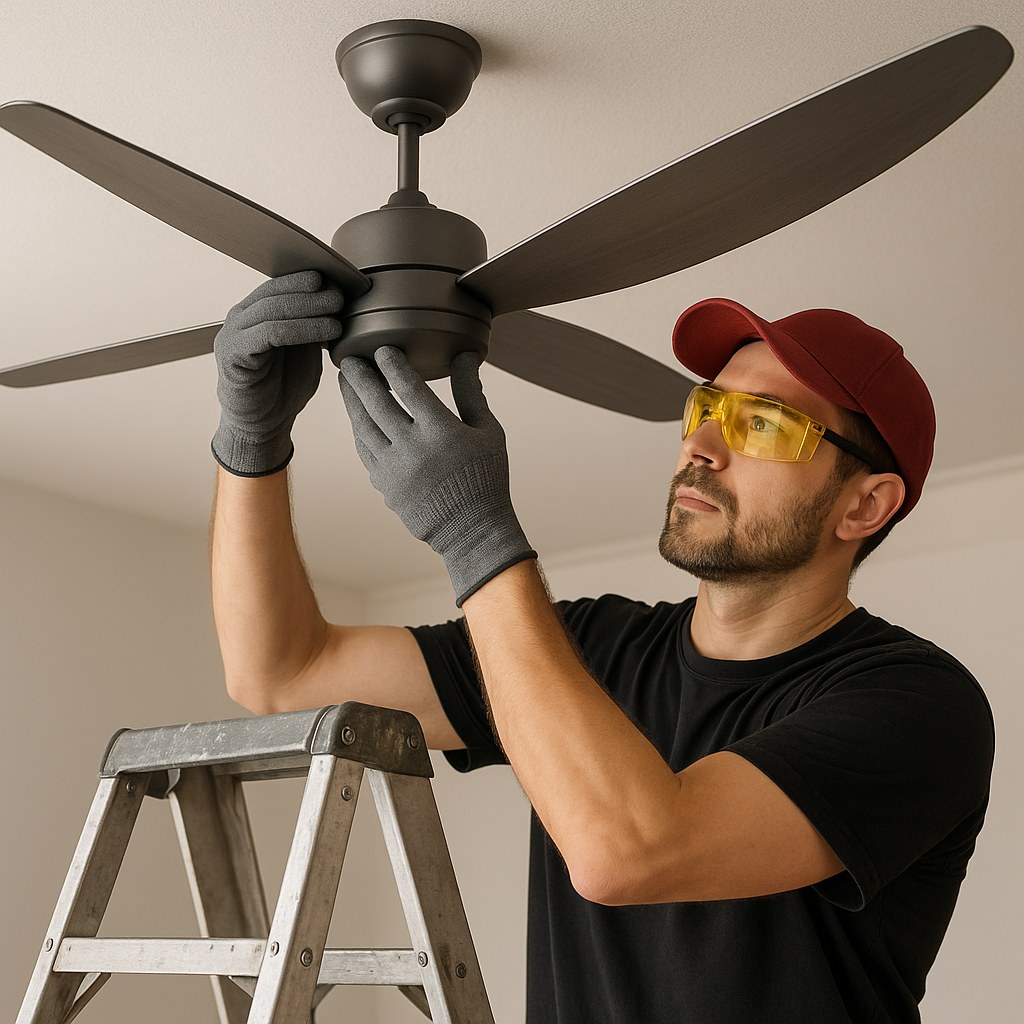
How to Install Your Ceiling Fan with an Existing Fan-Rated Box
This is the most common scenario. Your ceiling is prepped and ready to go. Let's hang that fan!
Step 1: Attach the Mounting Bracket
Your fan kit will include a metal mounting bracket. This piece attaches directly to the fan-rated electrical box in the ceiling using the screws provided. Make sure it's tightened securely, as this bracket will support the entire weight of the fan.
Step 2: Assemble and Hang the Fan Motor
It's much easier to wire the fan when you're not trying to hold the heavy motor at the same time. Most brackets have a hook for this very purpose.
- For High or Sloped Ceilings: If your ceiling is taller than 9 feet or angled, you'll likely use a downrod. This is a metal pipe that connects the motor to the mounting bracket. Feed the fan's wires through the downrod, screw it tightly into the motor housing, and slide the decorative canopy over it. Then, lift the entire assembly and seat the ball at the top of the downrod into the slot on the mounting bracket.
- For Standard Ceilings (Flush Mount): If your fan is a "hugger" or flush-mount style, you'll attach the canopy directly to the motor. Then, lift the motor and hang it on the hook provided on the mounting bracket.
Step 3: Wire It Up
Here’s where you connect the fan to your home’s electricity. It might look like a tangle of wires, but it's straightforward if you follow the colors.
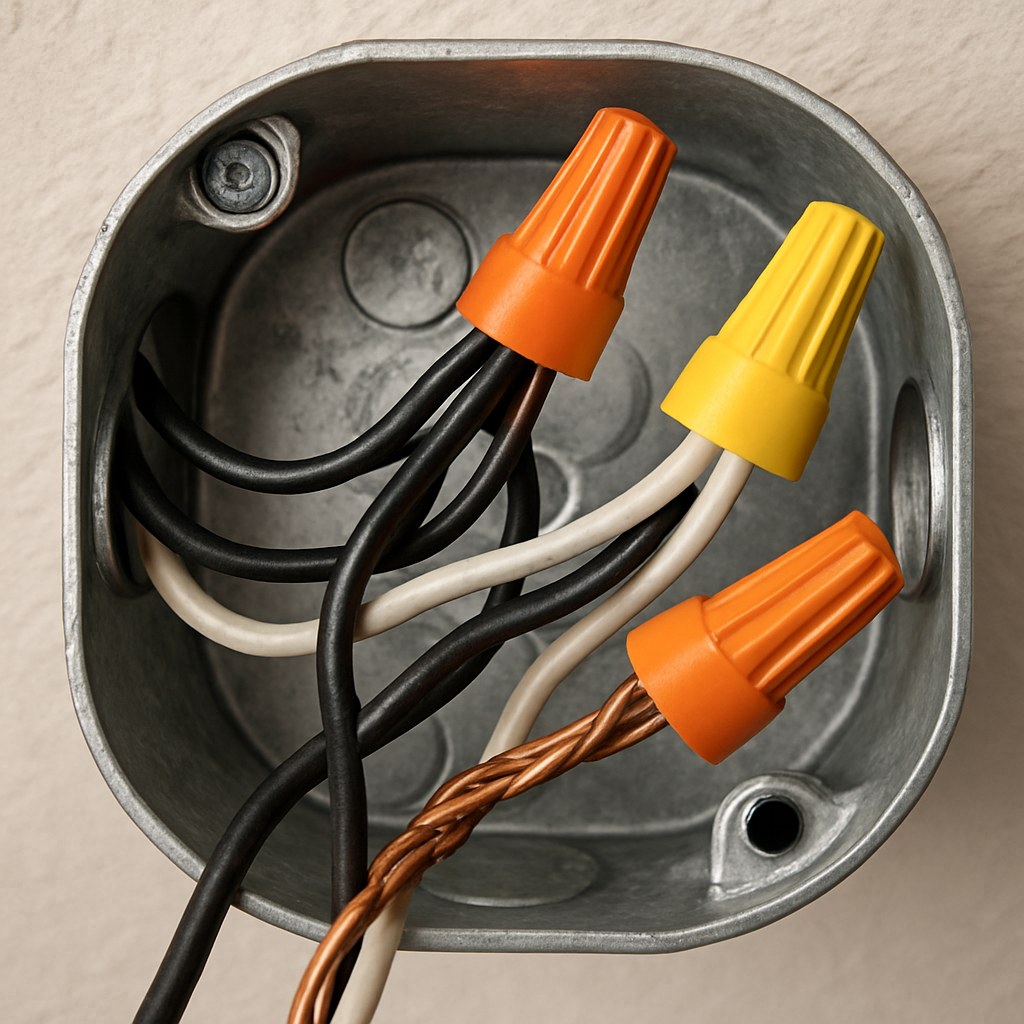
- White Wire (Neutral): Connect the white wire from the ceiling to the white wire from the fan motor.
- Green/Bare Wire (Ground): Connect the green or bare copper wire from the ceiling to the green ground wire from the fan and/or the green screw on the mounting bracket.
- Black & Blue Wires (Hot): This depends on your switch setup.
- Single Switch (Fan and Light on one switch): Connect the black wire from the ceiling to BOTH the black fan motor wire and the blue light kit wire. Twist them all together with a single wire connector.
- Dual Switches (Separate switches for fan and light): You'll need two hot wires in your ceiling box (usually one black, one red). Connect the black ceiling wire to the black fan wire. Connect the red ceiling wire to the blue light kit wire.
Secure each connection by twisting the wires together clockwise and screwing on a wire connector. Gently tug on each wire to ensure it's secure.
Step 4: Final Assembly
- Mount the Canopy: Carefully tuck all the wires up into the electrical box. Lift the motor off the temporary hook, align it with the bracket, and secure it. Slide the canopy up to the ceiling and fasten it with the provided screws.
- Attach the Fan Blades: First, attach each fan blade to its corresponding blade arm (or "iron"). Then, screw each blade arm onto the fan motor. Doing this last saves you from awkwardly working around the blades while wiring.
- Install the Light Kit: If your fan has a light, plug in its wire connector and attach the kit to the motor assembly. Screw in the light bulbs and attach any glass shades or covers.
Step 5: Test Your Work!
Go back to the electrical panel and flip the breaker to the “ON” position. Use the wall switch and the fan's pull chains to test all the speeds and the light. Success!
No Fan-Rated Box? Here’s How to Install One
If your inspection revealed a standard plastic box, you need to replace it. The most common way to do this without opening up the entire ceiling is with an expandable fan brace.
- Power Off and Remove the Old Box: Make sure the power is off. Disconnect the wires and pry or unscrew the old electrical box from the ceiling joist.
- Install the Brace: An expandable brace is designed to fit through the hole left by the old box. Push it through the hole and position it so it rests on top of the drywall. Rotate the bar with a wrench; this will cause it to expand and dig its sharp ends securely into the two adjacent ceiling joists.
- Attach the New Box: Once the brace is tight and secure, pull the house wiring into the new fan-rated metal box and attach the box to the brace using the hardware provided.
Now that you have a secure, fan-rated box, you can go back to the previous section and follow the steps for mounting, wiring, and assembling your fan.
Troubleshooting Common Ceiling Fan Problems
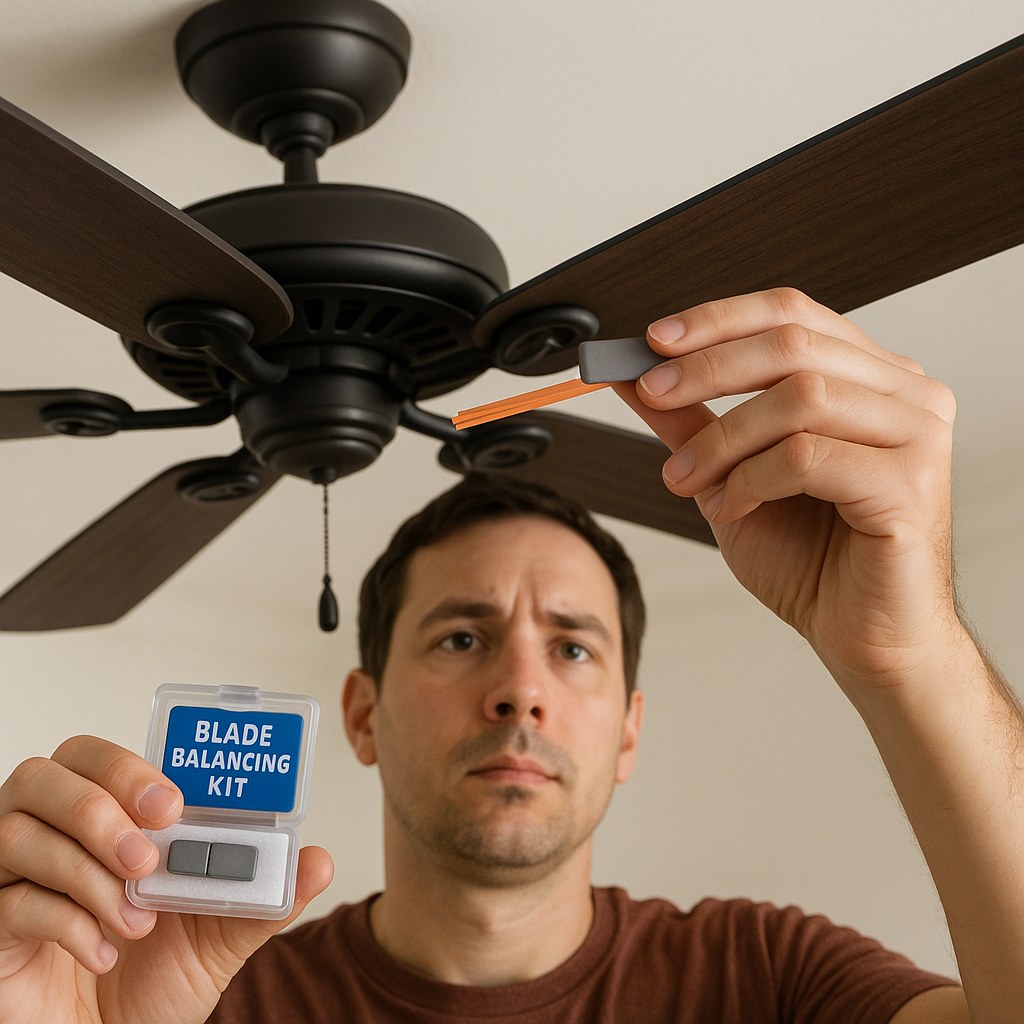
- My Fan Wobbles: A little wobble is normal, but excessive wobbling is usually caused by imbalanced blades. First, ensure all screws on the blades and mounting bracket are tight. If it still wobbles, use the balancing kit included with your fan. This involves attaching a small clip to different blades to find the culprit, then sticking on a small weight to correct the imbalance.
- The Lights Flicker: This can be due to a loose wire connection, so double-check your wiring. It can also happen if you're using a dimmer switch that isn't compatible with your fan or LED bulbs.
- The Fan or Light Doesn't Work: The first step is always to check the breaker. If that's on, check your wire connections again. Also, make sure the pull chain hasn't been pulled to the "off" position, and if you have a remote, check the batteries.
You've Got This!
Installing a ceiling fan is a fantastic way to improve your home's comfort and value. By prioritizing safety and following these steps, you can successfully complete this project and enjoy the rewards for years to come.
And for your next project? Don't go it alone. Download the Casa app today! Casa is your personal home maintenance partner, putting expert guides, project management tools, and access to vetted professionals right in the palm of your hand. Whether you're fixing a running toilet or planning a major renovation, Casa makes homeownership easier.

